Embroidering pillowcases is a wonderful way to add a personal and creative touch to your bedding. Whether you’re a seasoned embroiderer or a beginner, here’s a step-by-step guide to help you get started with pillowcase embroidery:
Materials You’ll Need:
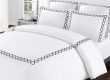
- Pillowcases: Choose plain, solid-colored pillowcases made of cotton or another fabric suitable for embroidery.
- Embroidery Hoop: An embroidery hoop helps keep the fabric taut and makes it easier to work with.
- Embroidery Thread: Select embroidery floss or thread in your chosen colors. You can use a single color or create a multi-color design.
- Embroidery Needles: Use embroidery or crewel needles with a sharp point and large eye to accommodate embroidery thread.
- Scissors: Sharp scissors are essential for cutting the embroidery thread and trimming excess fabric.
- Embroidery Pattern: Choose or create an embroidery pattern or design that you’d like to add to your pillowcases. You can find pre-made patterns online or design your own.
Steps to Embroider Pillowcases:
- Prepare the Fabric:
- Wash and iron your pillowcases to ensure they are clean and wrinkle-free.
- Place the pillowcase over the embroidery hoop, centering the area where you want to embroider.
- Transfer the Design:
- If you have a pre-made embroidery pattern, you can transfer it to the fabric using one of the following methods:
- Tracing the design onto the fabric with a washable fabric marker or pencil.
- Using iron-on transfer paper, which allows you to print your design onto the fabric using an iron.
- Creating a freehand design directly on the fabric with a fabric marker.
- If you have a pre-made embroidery pattern, you can transfer it to the fabric using one of the following methods:
- Thread the Needle:
- Cut a length of embroidery thread (usually around 18 inches) and thread it through the needle’s eye. You can use a single strand or multiple strands, depending on the desired thickness of your embroidery.
- Start Stitching:
- Begin stitching following the design or pattern you’ve transferred. Common embroidery stitches for pillowcases include backstitch, satin stitch, and French knots. Choose the stitch that best suits your design.
- Secure the Thread:
- To start, make a small knot at the end of the thread to secure it to the fabric.
- Continue Stitching:
- Work on your design one section at a time, following the pattern. Be patient and take your time to ensure neat and even stitches.
- Finish and Secure:
- To finish a section or your entire design, make a small knot on the backside of the fabric to secure the thread. Trim any excess thread.
- Repeat for Additional Designs: If you want to add more designs or elements to the pillowcase, repeat the process using different thread colors and stitches.
- Wash and Iron: After you’ve completed the embroidery, wash and iron the pillowcase again to remove any marks or wrinkles caused by the embroidery process.
- Enjoy Your Personalized Pillowcases: Once your pillowcases are clean and pressed, place them on your pillows, and enjoy your personalized bedding.
Embroidering pillowcases is a creative and satisfying way to add a personal touch to your bedroom decor. Whether you choose to embroider your initials, a favorite quote, or a custom design, your embroidered pillowcases will add a unique and charming element to your bedding ensemble.